Technology
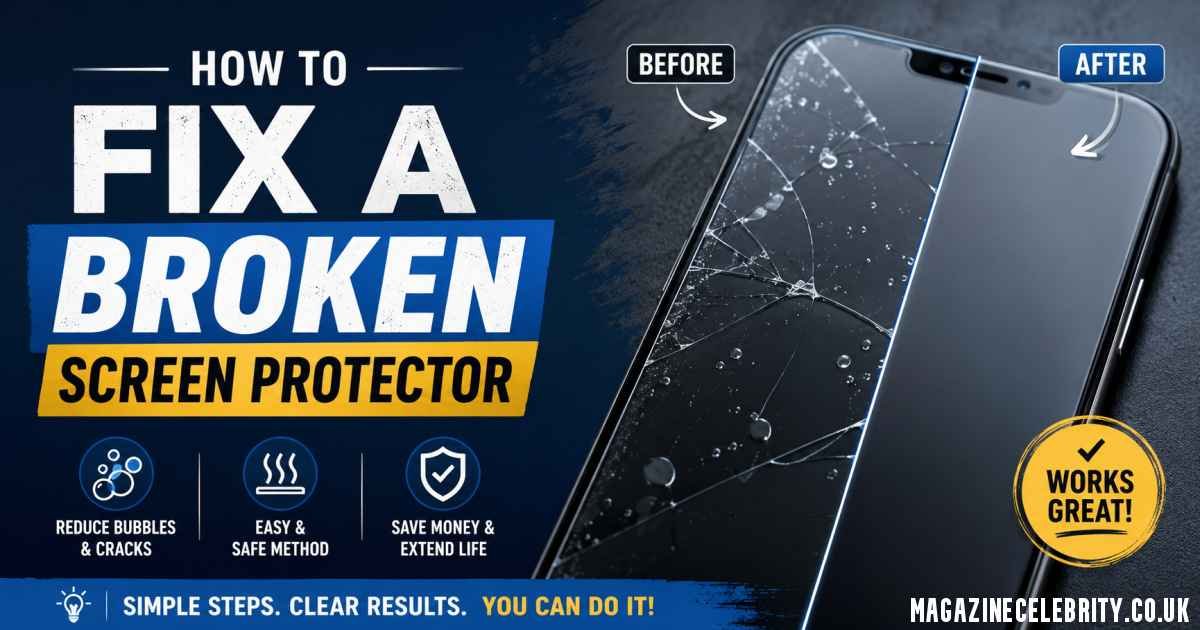
How to Fix a Broken Screen Protector in 2026? Complete Step-by-Step Guide
A cracked screen protector can instantly make even the newest smartphone look damaged and frustrating to use. The good news is that in 2026, replacing a broken screen protector is easier than ever. Whether you use a tempered glass protector, TPU film, or the latest self-healing hydrogel screen protectors, you can safely remove and replace it at home in under 10 minutes without damaging your real display.
The most important thing to understand is this: you cannot truly repair a cracked screen protector. Once it breaks, bends, or creases, its protective structure is compromised. The real solution is safely removing the damaged protector and installing a new one properly.
This complete guide explains exactly how to identify your protector type, remove it safely, avoid damaging your phone, and install a replacement like a professional.
Should You Fix or Replace a Broken Screen Protector?

How to Fix a Broken Screen Protector in 2026?
The first question most people ask is whether they can simply keep using the damaged protector. Technically yes — but it’s a bad idea.
A cracked screen protector creates several problems:
- Sharp glass splinters can cut your fingers
- Reduced touch sensitivity causes ghost touches
- Dust and moisture can slip under cracks
- The damaged protector may scratch the actual display
- It lowers the phone’s appearance and resale value
Important Rule in 2026
If you can:
- See the crack
- Feel the crack
- Notice bubbles or lifting edges
…it’s time to replace the protector immediately.
Modern smartphone screens on devices like the iPhone 16 Pro, Galaxy S24 Ultra, and Pixel 9 Pro use advanced coatings and OLED panels that deserve proper protection. A broken protector no longer does its job effectively.
Identify Your Screen Protector Type Before Removal
Before removing anything, you must identify which type of protector is installed. Different materials require different removal methods.
| Protector Type | Characteristics | Removal Difficulty |
|---|---|---|
| Tempered Glass | Hard, rigid, glass feel, cracks into shards | Easy to Medium |
| TPU Film | Flexible plastic, bends without cracking | Easy |
| Hydrogel Protector | Gel-like, ultra-thin, self-healing | Medium |
| Privacy/Matte Glass | Dark viewing angles or frosted surface | Same as tempered glass |
| UV LOCA Glue Glass | Curved-screen adhesive cured with UV light | Hard |
Quick Identification Trick
Tap the corner with your fingernail:
- If it sounds hard and “clicky,” it’s tempered glass
- If it bends slightly or feels soft, it’s TPU or hydrogel
Correct identification matters because using the wrong removal technique can damage your screen’s coating or leave stubborn adhesive behind.
Tools You Need to Remove a Broken Screen Protector Safely
Never use knives, razors, scissors, or metal tools. These can permanently scratch your display.
Recommended Tools in 2026
Prepare these items first:
- Hair dryer or low-heat gun
- Plastic card (gift card or guitar pick)
- Strong tape (duct tape or packing tape)
- Microfiber cloth
- 70% isopropyl alcohol
- Wooden toothpick
- Nitrile gloves
- Replacement screen protector
Pro Tip for 2026
Many new smartphones from Apple, Samsung, Google, and OnePlus now include free mini removal tools inside screen protector kits. Check the packaging before buying extra accessories.
Having the new protector ready immediately is important because dust can settle on the screen within minutes.
Step-by-Step: How to Remove a Cracked Tempered Glass Protector
How to Fix a Broken Screen Protector in 2026?
Tempered glass is the most common protector type in 2026. Here’s the safest removal method.
Step 1: Turn Off Your Phone
Powering off the phone prevents accidental touches and makes cracks easier to see.
Step 2: Apply Gentle Heat
Use a hair dryer on low heat for 20–30 seconds.
- Hold it about 6 inches away
- Move constantly in circles
- Focus on the edges
Heat softens the adhesive and helps the glass come off cleanly.
Step 3: Stabilize Broken Glass with Tape
If the protector is badly shattered:
- Place strips of duct tape across the surface
- Press gently
This prevents tiny glass fragments from scattering during removal.
Step 4: Lift a Corner Carefully
Use:
- A wooden toothpick
- Plastic card
- Guitar pick
Start at the corner with the largest crack.
Never force the edge upward aggressively.
Step 5: Peel Slowly at a Shallow Angle
Keep the card nearly flat against the screen while peeling slowly.
If resistance increases:
- Add more heat for 10 seconds
- Continue gradually
Pulling too quickly can leave adhesive behind or send shards flying.
Step 6: Clean Remaining Adhesive
Apply 70% isopropyl alcohol to a microfiber cloth — never directly onto the phone.
Wipe gently in circles.
Avoid household cleaners like:
- Windex
- Bleach sprays
- Ammonia products
These damage screen coatings.
Total removal time is usually 3 to 5 minutes.
How to Remove TPU, Hydrogel, and Film Protectors
Flexible protectors are easier because they don’t shatter, but they can stretch or leave sticky residue.
Step 1: Warm the Edges
Apply light heat for about 10 seconds.
Too much heat can make TPU film sticky and difficult to remove.
Step 2: Peel Slowly Backward
Lift one corner and pull the protector:
- Back over itself at a 180° angle
- Not straight upward
This reduces adhesive residue significantly.
Step 3: Remove Sticky Spots
For stubborn hydrogel residue:
- Use isopropyl alcohol on a cotton swab
- Roll gently over adhesive areas
Unlike tempered glass, flexible films don’t require the tape safety step because there are no dangerous shards.
Removing UV Glue (LOCA) Screen Protectors Safely
Curved-screen devices like the:
- Samsung Galaxy S24 Ultra
- Pixel 9 Pro
- OnePlus 12
often use LOCA UV adhesive protectors, which are more difficult to remove.
Safe Removal Process
Apply Longer Heat
Warm the protector for 60 seconds while continuously moving the hair dryer.
Use High-Strength Alcohol
Carefully drip 99% isopropyl alcohol along the edges.
Wait about 2 minutes for the adhesive to loosen.
Use Dental Floss Technique
Slide dental floss beneath one corner and gently saw side-to-side underneath the protector.
Critical Warning
If you notice:
- Screen discoloration
- OLED lifting
- Excessive resistance
…stop immediately and visit a repair professional.
Pulling too hard can damage the actual display assembly.
Installing a New Screen Protector Without Bubbles
The second half of the “fix” is applying the new protector correctly.
Best Practices for 2026
Install in a Steamy Bathroom
Run a hot shower briefly before installation.
Steam pulls airborne dust downward, reducing contamination.
Use Dust Stickers
Modern protector kits include dust-removal stickers.
Always dab — never wipe.
Use Alignment Frames
Most premium brands now include:
- Auto-alignment trays
- Positioning frames
- Guided install systems
These dramatically improve installation accuracy.
Bubble Removal Tips
If bubbles appear:
- Push them toward the nearest edge using a card
- If dust is trapped, lift the corner with tape
- Remove the particle using a dust sticker
- Reapply carefully
New 2026 Trend: Auto-Alignment UV Kits
Brands like:
- ESR
- Spigen
- Whitestone Dome
now offer advanced bubble-free hydrogel systems using UV curing and self-leveling liquid adhesive.
These are especially useful for curved OLED displays.
Common Mistakes That Damage Real Screens
Avoid these expensive errors:
Using Metal Tools
Knives and razor blades cause permanent micro-scratches.
Pulling Straight Up
This creates suction and may lift OLED layers on modern phones.
Using Too Much Alcohol
Liquid can seep into:
- Speaker grills
- Charging ports
- Buttons
Always apply cleaner to the cloth first.
Ignoring Tiny Glass Splinters
After removal, lightly dab tape across the screen to collect microscopic shards.
Reusing an Old Protector
Once cracked or bent, adhesive performance is ruined permanently.
When You Should Visit a Professional Repair Shop
Sometimes professional help is safer.
Visit a repair technician if:
- The actual phone screen is cracked underneath
- UV glue protectors won’t release
- You have shaky hands or poor vision
- Glass shards are embedded near edges
- The display begins lifting during removal
Many stores including:
- uBreakiFix
- Best Buy
- Carrier repair centers
will often remove old protectors for free if you purchase a replacement from them.
Conclusion
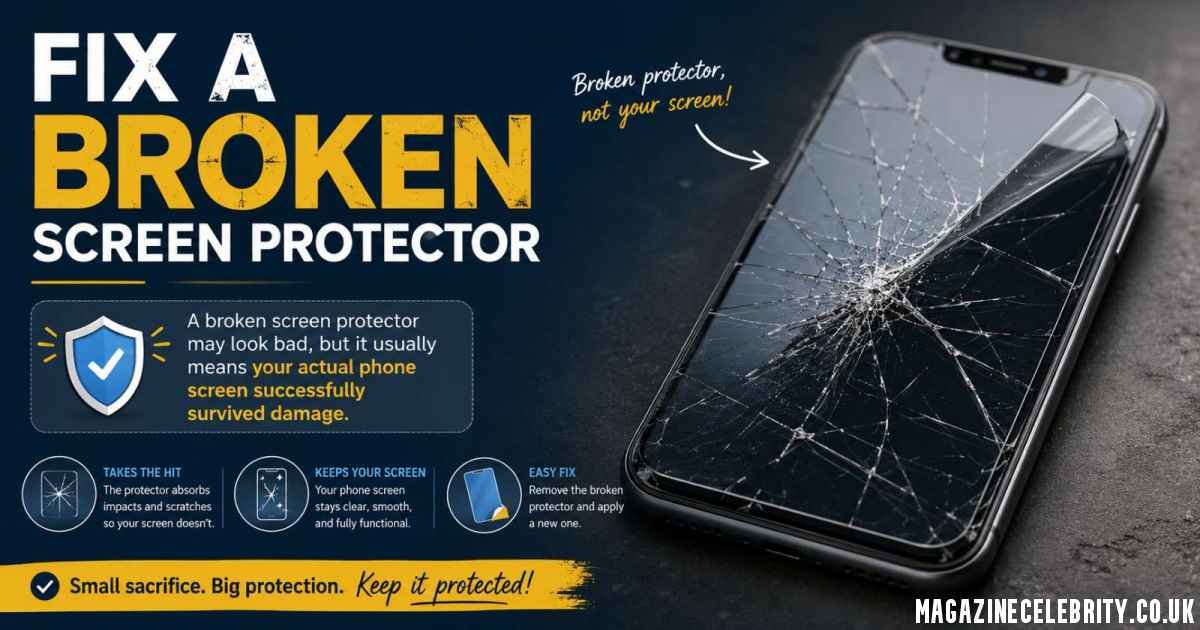
A broken screen protector may look bad, but it usually means your actual phone screen successfully survived damage — which is exactly what the protector was designed to do.
In 2026, replacing a damaged protector is simple if you follow the correct steps:
- Power off the phone
- Apply gentle heat
- Remove slowly using plastic tools
- Clean carefully
- Install a fresh protector properly
Whether you use tempered glass, hydrogel film, or advanced UV-curing protectors, the key is patience and proper technique.
Replacing your screen protector every 6–12 months — or immediately after cracks appear — helps maintain:
- Touch responsiveness
- Display clarity
- Fingerprint resistance
- Resale value
- Long-term screen protection
A cracked protector is annoying, but with the right approach, your phone can look brand new again in just a few minutes.